
TL;DR
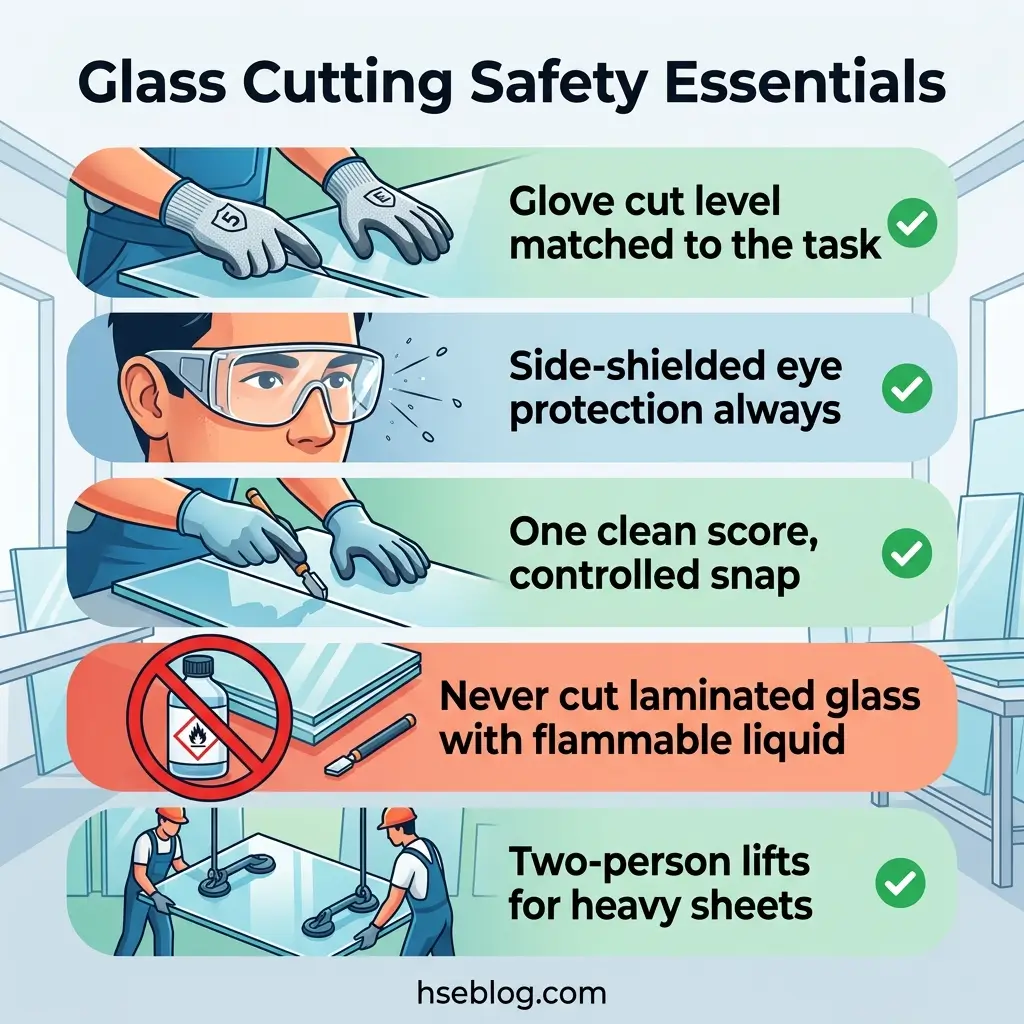
- Match the glove, don’t just wear one: glass handling usually calls for mid-to-high cut protection — around ANSI A4–A5, or an equivalent EN 388 level — with a grip coating.
- Protect against fragments, not dust alone: side-shielded safety glasses to ANSI Z87.1 or EN 166 as a baseline; step up to goggles or a face shield when snapping or grinding.
- Score once, snap with control: a single clean score and a supported break beat repeated scoring, which multiplies sharp shards and misfires.
- Never cut laminated glass with a flammable liquid: OSHA links this method to burns and deaths; use carbide, saw, or waterjet methods instead.
- Respect the weight: heavy sheets cause crush and manual-handling injuries as serious as any laceration — use racks, suction cups, and a second person.
Glass cutting safety depends on two things working together: correct PPE and controlled technique. Handlers need cut-resistant gloves matched to the task (commonly ANSI A4–A5), side-shielded eye protection, and appropriate body cover. Safe technique means a single clean score, a supported snap, seamed edges, and never using flammable liquids to separate laminated glass.
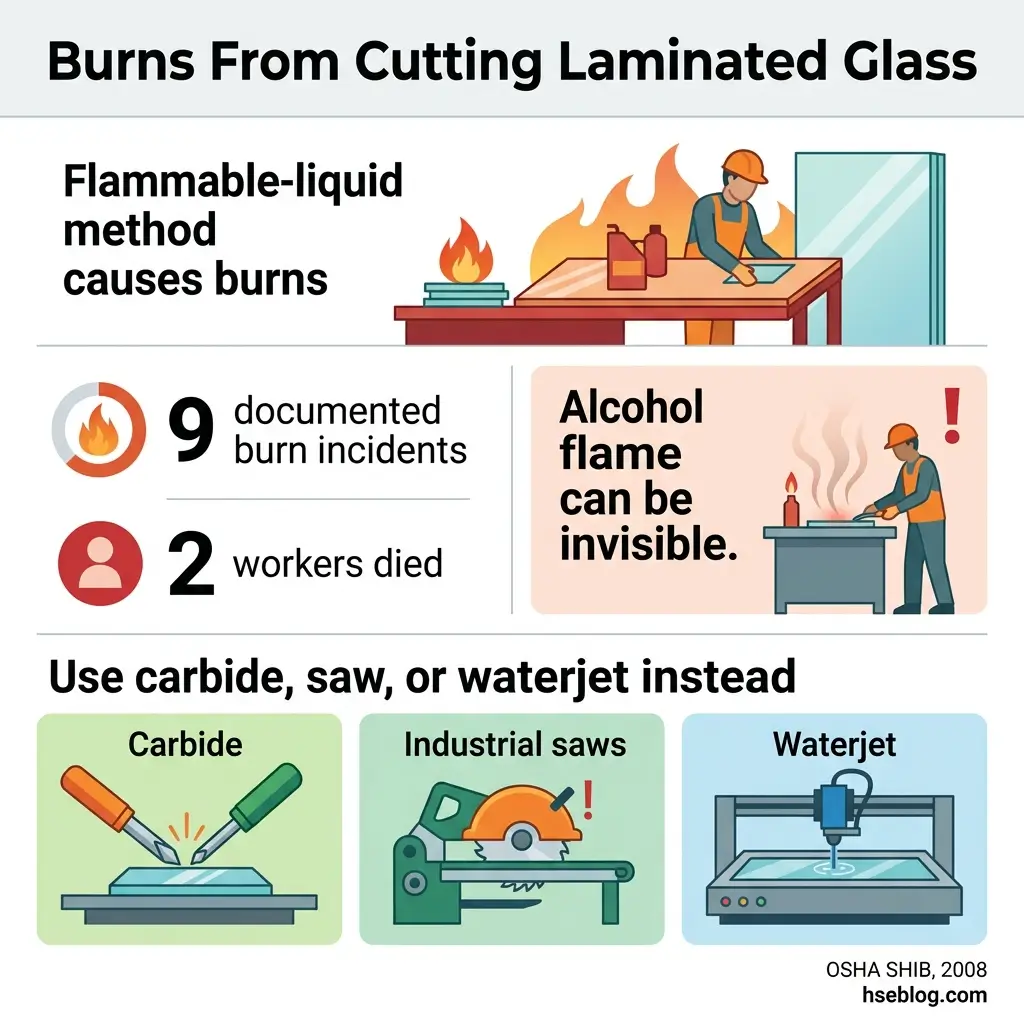
In 2004, an apprentice at a glass installer in Pennsylvania was pouring denatured alcohol to help separate a sheet of laminated glass when the vapor ignited and the container exploded, leaving him with second- and third-degree burns (OSHA SHIB, 2008). It reads like a freak event, yet OSHA’s own records tie the same cutting method to eight further burn cases and two deaths.
That fire risk sits at the extreme end of a job most people underestimate. Lacerations, crushed hands, eye injuries from fragments, and airborne dust are the everyday reality of glass work. Strong glass cutting safety comes from pairing the right PPE with disciplined technique — not leaning on one to cover for the other. What follows maps the hazard pathways, how to rate protective equipment, the mechanics of a clean cut, the laminated-glass fire hazard, and safe handling and cleanup.
The Real Hazards Behind Glass Cutting
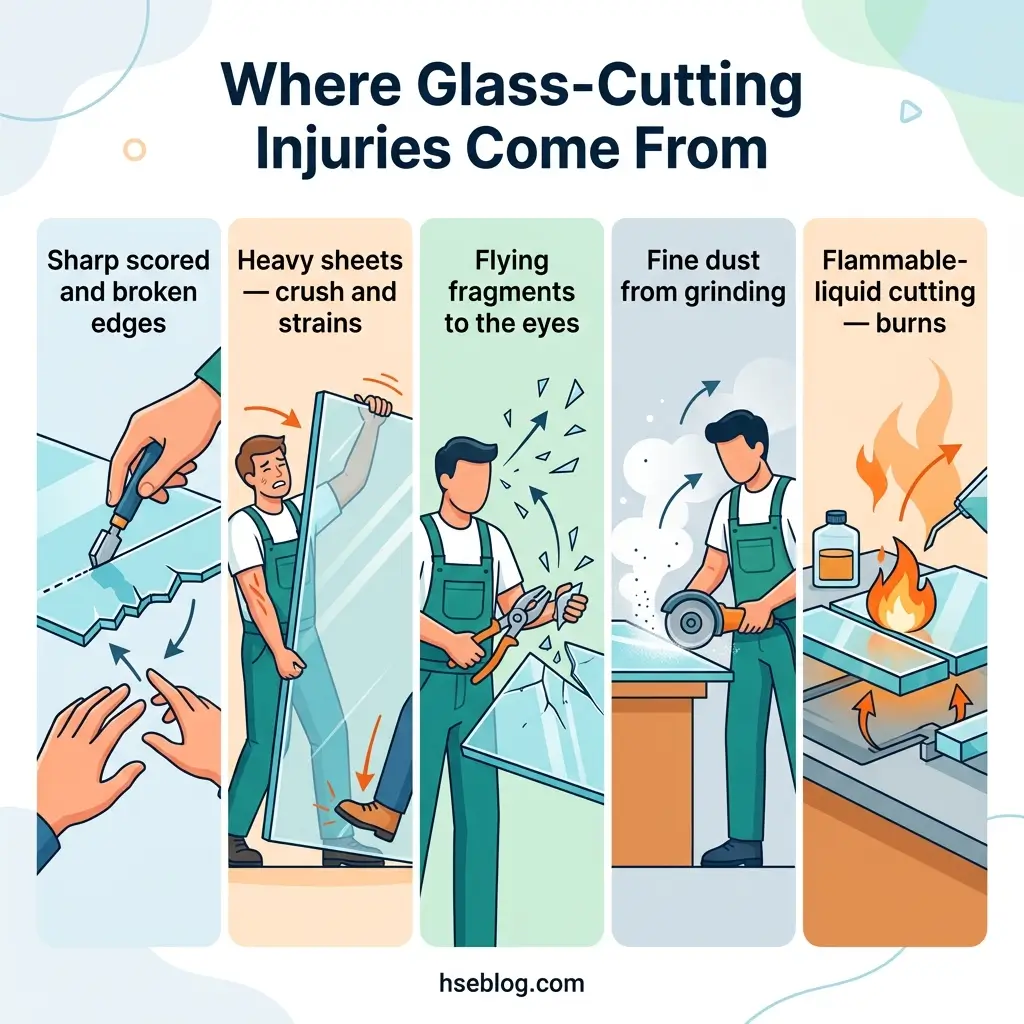
Most glass injuries come from four distinct mechanisms, and cuts are only one of them. Naming each one is the first step to selecting protection that actually fits the work.
- Lacerations from edges: A freshly scored or broken edge is razor-sharp. Deep cuts happen most often on cleanup and on the “finished” edge people assume is safe.
- Crush and impact from weight: Glass is dense and heavy. A sheet that slips, tips, or pins a hand does damage that has nothing to do with sharpness.
- Eye injuries from fragments: Scoring, snapping, and grinding all throw fine chips. These travel fast and target unprotected eyes.
- Airborne dust: Grinding and edge-seaming release fine particulate. It irritates the eyes and airways even when it is not the crystalline silica many people assume.
A recurring theme across glass-industry safety guidance is that impact and crush injuries from heavy sheets can be as disabling as lacerations. The sharp edge gets the attention, but the weight does the quiet damage — a point worth remembering before every lift.
Cut-Resistant Gloves: Matching the Rating to the Task
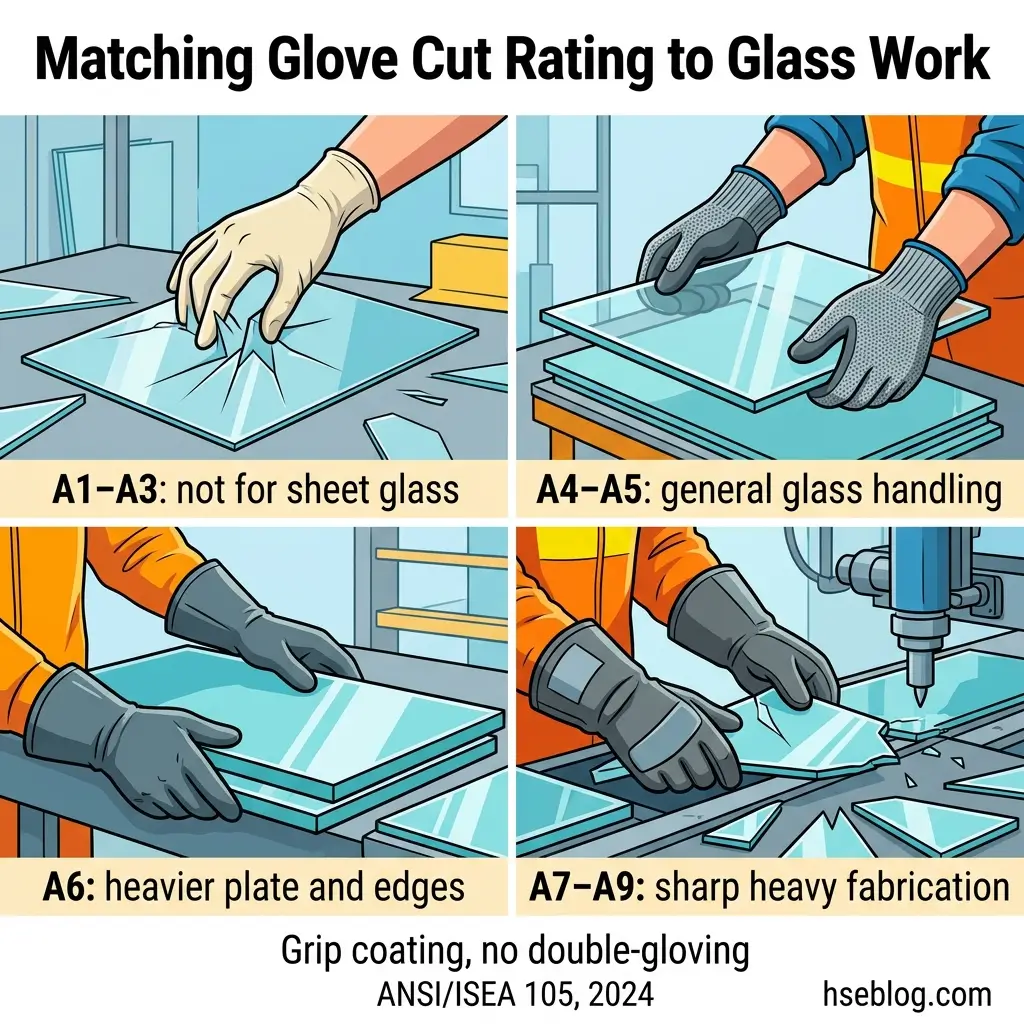
Cut-resistant gloves only protect when the rating matches the hazard, and for glass that usually means the mid-to-upper part of the scale. As of the 2024 revision, ANSI/ISEA 105 grades cut resistance on a nine-level scale (A1–A9) based on the grams of force needed to cut through the material, measured on a standardized TDM test machine.
| ANSI/ISEA cut level | Force to cut (grams) | Typical glass application |
|---|---|---|
| A1–A3 | 200–1,499 | Light packaging, small items — not sheet glass |
| A4–A5 | 1,500–2,999 | General glass handling, bottles, light plate |
| A6 | 3,000–3,999 | Heavier plate and fabrication edges |
| A7–A9 | 4,000–6,000+ | Sharp heavy sheets, high-volume fabrication |
Gram ranges: ANSI/ISEA 105-2024. Under US rules, 29 CFR 1910.138 requires employers to select hand protection based on the performance characteristics of the glove against the actual task — so the level above is a starting point, not a substitute for a hazard assessment.
Two practical points get missed on real sites:
- “Cut-resistant” is not “cut-proof.” No glove is immune to a blade or a sharp edge under enough force. Gloves reduce severity and buy reaction time; they do not license careless handling.
- The scales do not convert cleanly. ANSI/ISEA 105 (grams) and EN 388 (which reports both a coupe test, 1–5, and an ISO 13997 blade test, A–F) are not directly interchangeable, so check the actual test result rather than assuming a rating maps across.
Dexterity matters as much as the number. A glove so thick it kills feel can cause the very fumbles it was meant to prevent, which is why grip-coated gloves designed for glass — allowing single-gloving without marring the surface — have become the sensible middle ground.
Regulatory points here reflect a general HSE understanding of US (OSHA) and UK/EU requirements as of 2025 and are not legal advice; confirm current obligations for your jurisdiction with qualified counsel.
Eye, Face, and Body Protection for Glass Work
Eye protection is the non-negotiable minimum for any glass cutting, and the right level depends on how the glass is being worked. The general rule is simple: the more the glass is broken, snapped, or ground, the more sealed and impact-rated the protection needs to be.
Eyes and face
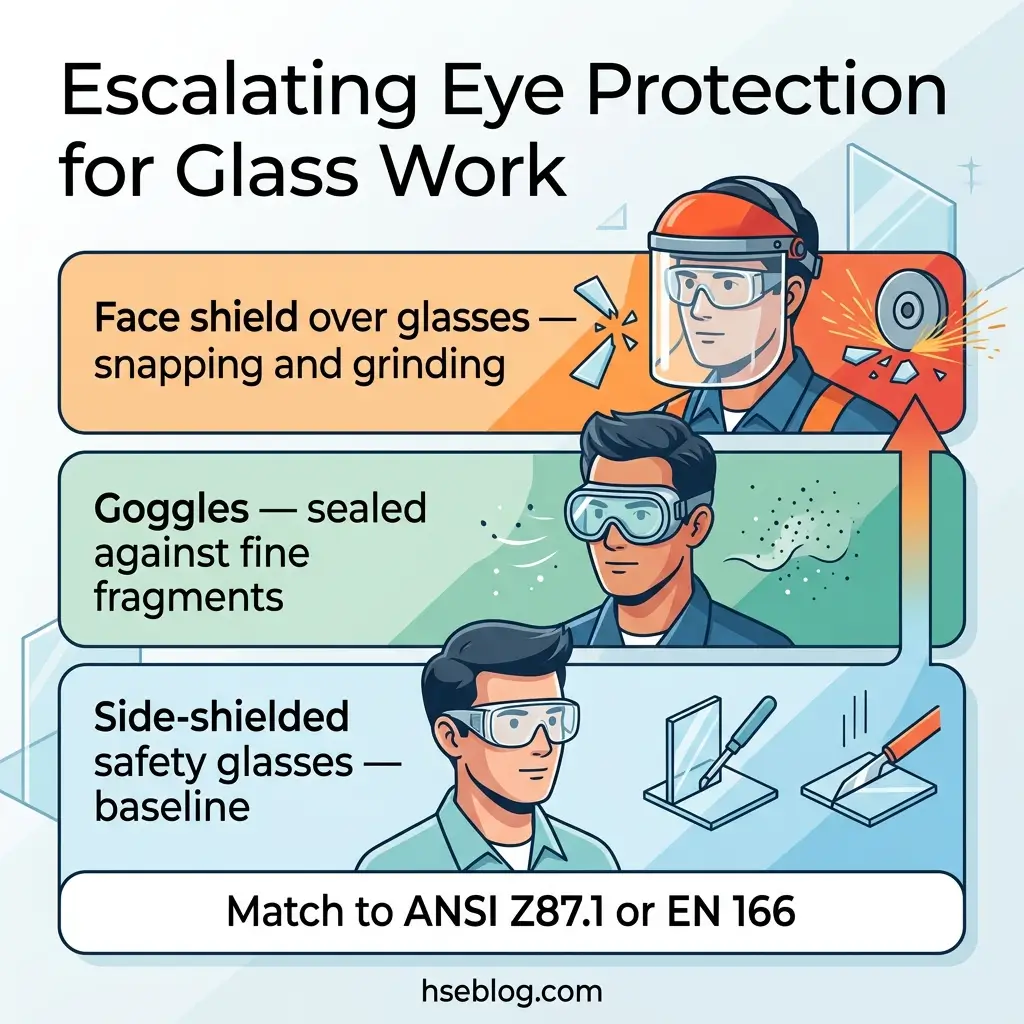
Because glass cutting generates flying chips, US rules under 29 CFR 1910.133 require eye protection with side protection wherever there is a flying-object hazard, and devices must meet ANSI Z87.1. The European equivalent, EN 166, marks impact resistance with letters (F for low energy, B for medium), and is gradually being superseded by EN ISO 16321.
- Side-shielded safety glasses: the everyday baseline for scoring and light handling.
- Goggles: a sealed choice when fine fragments or dust are in play.
- Face shield over glasses: for snapping large sheets or grinding, where a shield protects the wider face while glasses stay on underneath.
Beyond the hands and eyes
Forearms and torso take splash exposure from shards during large-sheet work, so protection should not stop at the wrist.
- Cut-resistant sleeves: for exposed forearms when carrying or maneuvering big sheets.
- Cut-resistant aprons or jackets: for torso protection during fabrication.
- Sturdy protective footwear: heavy sheets drop, and feet are directly in the fall line.
Safe Cutting Techniques: Score, Snap, and Seam
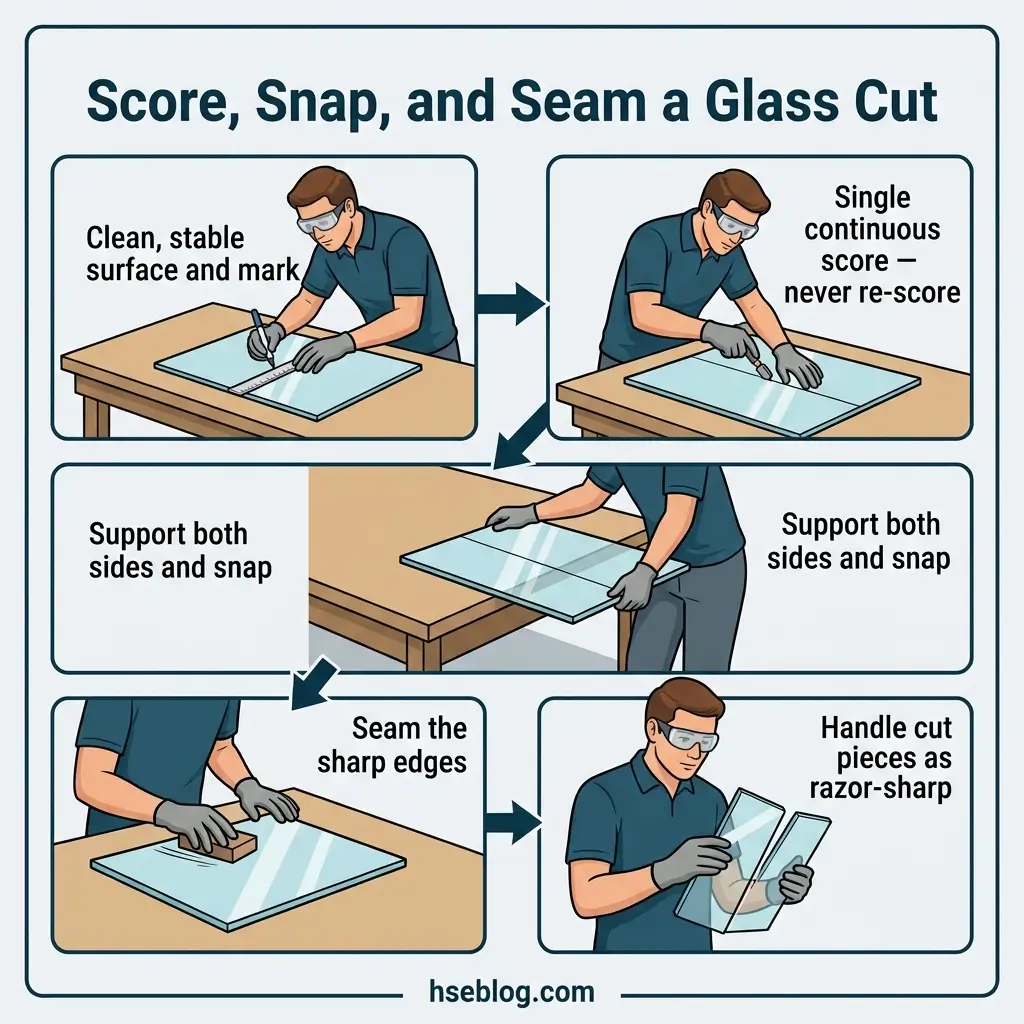
Cutting glass is really controlled breaking — you score a single line, then apply force so the glass fractures along it cleanly. The technique that produces a clean edge is also the technique that produces the fewest injuries, because ragged breaks throw more shards.
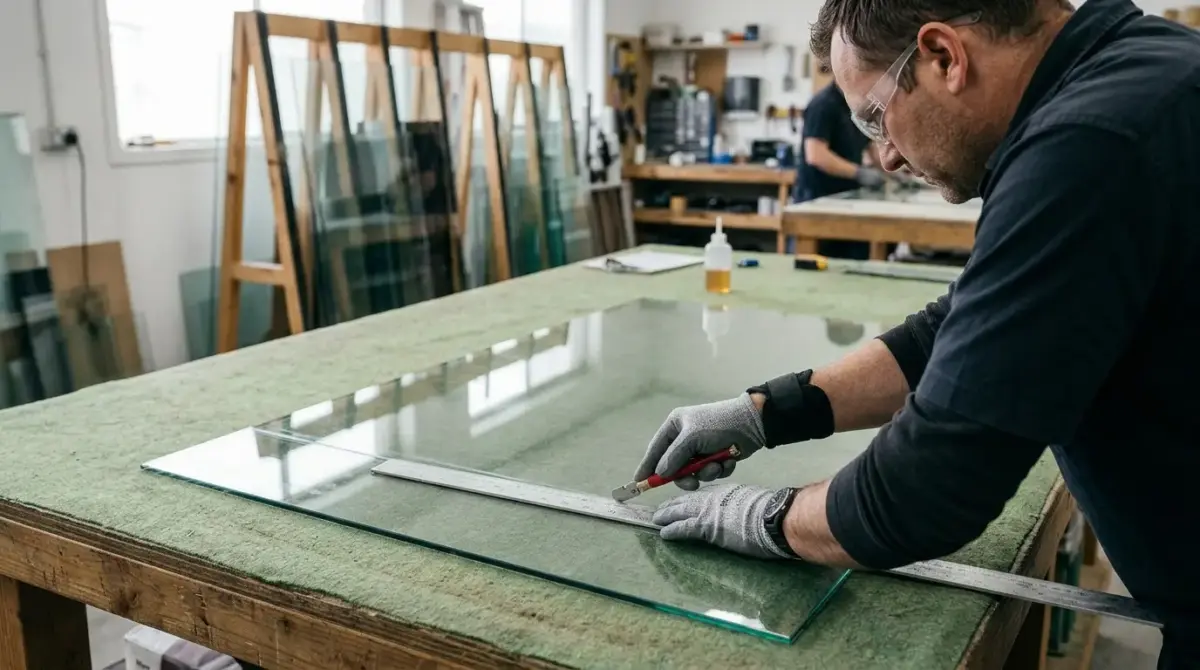
- Set up a clean, stable surface. Wipe the glass free of grit and mark the cut line; debris under the glass causes uneven scoring and unpredictable breaks.
- Oil the cutting wheel, not the glass. A lubricated wheel scores more smoothly and lasts longer.
- Make one continuous score. Draw the cutter with steady, even pressure in a single pass — do not go back over the line.
- Position the break. Align the score over a break bar or straight edge so the glass is supported on both sides of the line.
- Snap with control. Apply even downward pressure close to the score, supporting both pieces so the break follows the line and neither piece drops.
- Seam the edges. Grind or stone the fresh edge to remove the razor sharpness before the piece moves on.
The most common novice error is re-scoring the same line to “deepen” it. A second pass chips the surface and creates a weaker, less predictable break — which is exactly how a controlled cut turns into a handful of loose shards. Teaching a clean single score first prevents more cuts than any glove.
The Laminated-Glass Fire Hazard Most Guides Miss
Cutting laminated glass with a flammable liquid is a documented cause of serious burns and deaths, and it has no place in modern practice. The method involves scribing both sides, dripping denatured alcohol into the crack, and igniting it to melt the plastic (PVB) interlayer before finishing the cut by hand.
The danger is specific and well recorded. OSHA’s Safety and Health Information Bulletin describes a 2004 case where an apprentice suffered second- and third-degree burns when poured alcohol ignited and exploded, and it identified eight further burn incidents from the same practice — two of them fatal (OSHA SHIB, 2008). A particular trap: alcohol burns with a flame that can appear almost invisible in bright light, so a worker may pour more liquid straight onto an active flame.
Safer, established alternatives exist and should be the default:
- Purpose-built laminated-glass cutting tools and tables.
- Standard carbide cutting-wheel techniques.
- Vertically-inclined saw frames.
- Abrasive high-pressure waterjet cutting.
- Hot-air blowers to heat the interlayer without an open flame.
This article provides general HSE knowledge. High-consequence work such as cutting laminated glass — especially any method involving flammable liquids or powered saws — must be planned and supervised by a competent person with relevant training, jurisdiction-specific authorization, and a site-specific risk assessment. The information here does not replace that. For structured training, look to recognized pathways such as NEBOSH, IOSH, OSHA outreach courses, or a regional equivalent.
Full detail on approved containers, ignition-source control, and flame-resistant PPE is set out in the OSHA bulletin on cutting laminated glass with flammable liquids, which remains the clearest primary reference on why this method is discouraged.
Handling, Storage, and Cleanup Without New Injuries
More glass injuries happen during lifting, moving, and cleaning up than during the cut itself, which is why handling deserves as much rigor as the tool work. Each stage has its own failure mode and its own controls.
Manual handling of heavy sheets
Glass is heavy and awkward, so the risk is both a sudden crush and a slow musculoskeletal strain. In the UK, the Manual Handling Operations Regulations 1992 (HSE) require employers to assess and reduce the risk from heavy or unwieldy loads — glass is a textbook example.
- Use two people or mechanical aids — suction cups, A-frames, and trolleys — for anything large.
- Keep sheets vertical when carrying, and never rush a lift to beat a slipping grip.
Storage and transport
Poorly stored glass fails when it is least expected, so stability is the goal.
- Store on designated racks rated for glass, not leaned against a wall.
- Cushion and secure sheets with foam or padding, and transport them vertically and restrained.
Breakage cleanup
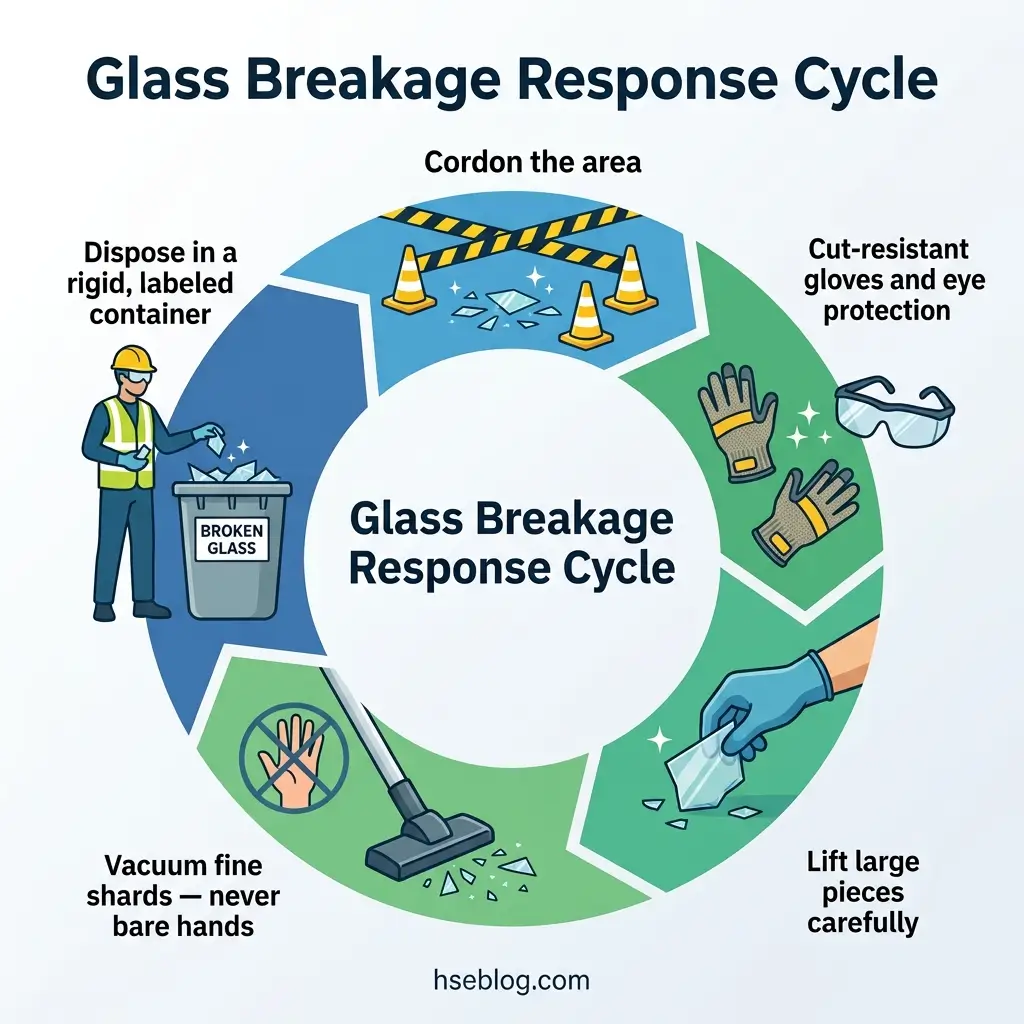
Breakage will still happen, and rushing the cleanup is how a minor incident becomes a deep cut.
- Cordon the area with signs or cones.
- Put on cut-resistant gloves and eye protection first.
- Lift large pieces carefully by hand.
- Sweep, then use a vacuum designed for glass to collect fine shards — never bare hands.
- Dispose of fragments in a rigid, labeled container.
Dust control and the silica myth
Grinding and seaming raise fine glass dust, and a common misconception treats it as the crystalline silica behind engineered-stone silicosis. Common soda-lime glass is amorphous silica and does not carry that same silicosis risk — but the dust is still a respiratory and eye irritant, so local exhaust ventilation and, for heavy grinding, appropriate respiratory protection remain sensible controls.
Frequently Asked Questions
Key Judgments for Safer Glass Cutting
The industry’s biggest blind spot is treating glass cutting as “just wear gloves.” Gloves matter, but the real reductions in injury come from three deliberate choices: rating the glove and eye protection to the specific task, retiring the flammable-liquid method for laminated glass entirely, and handling heavy sheets as a crush risk rather than an afterthought.
Technique carries as much weight as equipment. A single clean score, a supported snap, and a seamed edge remove sharp hazards at the source, while a rushed cleanup or a one-person lift quietly reintroduces them. Glass cutting safety is not a single rule but a chain of small, competent decisions that each close off a way to get hurt.
If one habit is worth fixing first, make it the freshly cut edge — the piece everyone assumes is finished, and the one that opens up more hands than the cutter ever does.\