
TL;DR
- If the breaker is not confirmed open, do not rack it — racking a closed breaker onto a live bus is a leading arc flash trigger.
- If the equipment can be isolated upstream, rack it dead — an electrically safe work condition removes the arc flash source entirely.
- If racking must happen energized, use remote racking or an extended handle — put the operator outside the arc flash boundary.
- If calculated incident energy exceeds 40 cal/cm², energized racking is not permitted — de-energize before any work (NFPA 70E).
Switchgear racking is the controlled insertion (racking in) or withdrawal (racking out) of a draw-out circuit breaker between its connected, test, and disconnected positions. Because the moving primary contacts engage live busbars, racking carries a high arc flash risk. The safest approach is to rack the breaker de-energized, or remotely from outside the arc flash boundary.
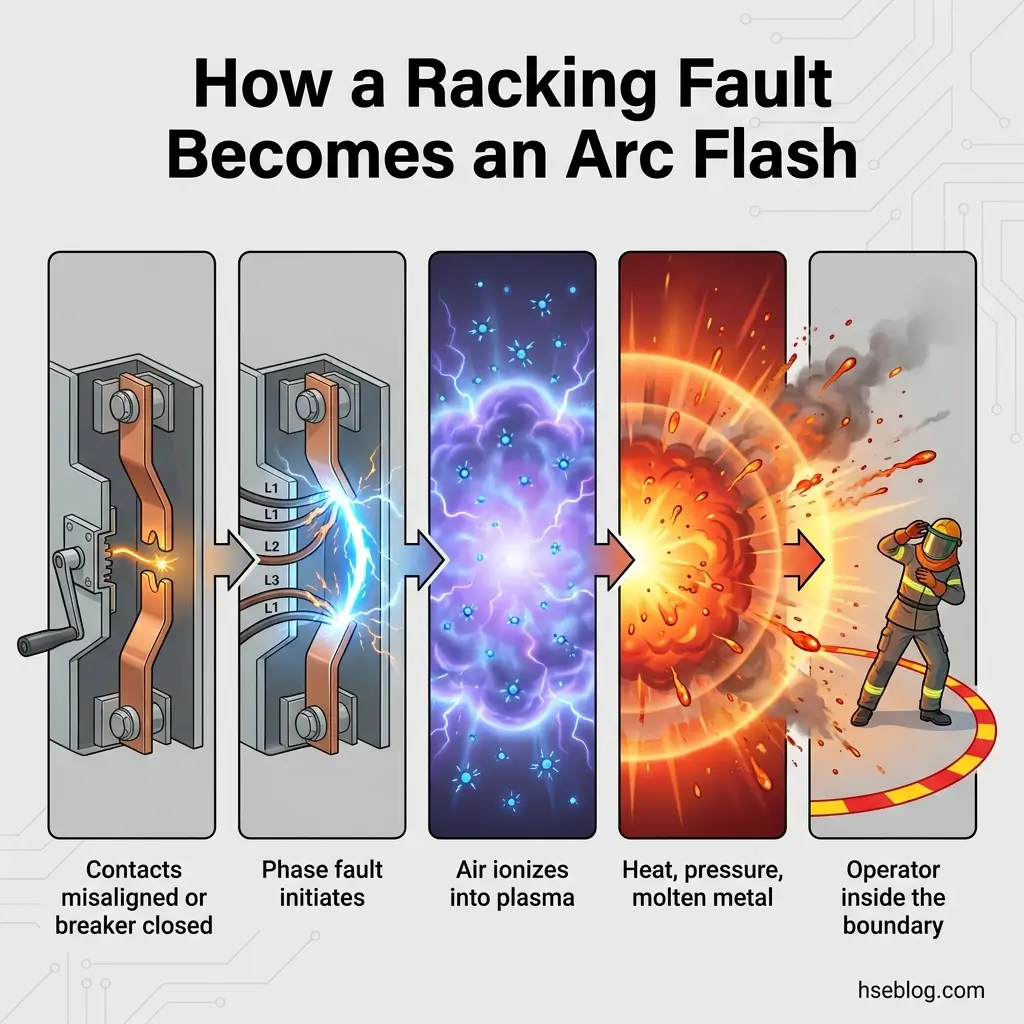
A draw-out breaker does not simply slide into place. As the racking mechanism drives the carriage forward, three primary disconnect fingers close on the fixed busbar stabs across a shrinking gap held at full system voltage.
That final travel is where switchgear racking earns its reputation: a misaligned contact, a breaker left closed, or a bind forced through can ignite a phase fault at the operator’s hands. This article covers how racking in and out actually works, why it concentrates arc flash risk, the sequence that controls it, and what NFPA 70E, OSHA, the HSE, and IEC standards require.
How Racking In and Out Moves the Breaker Onto Live Busbars
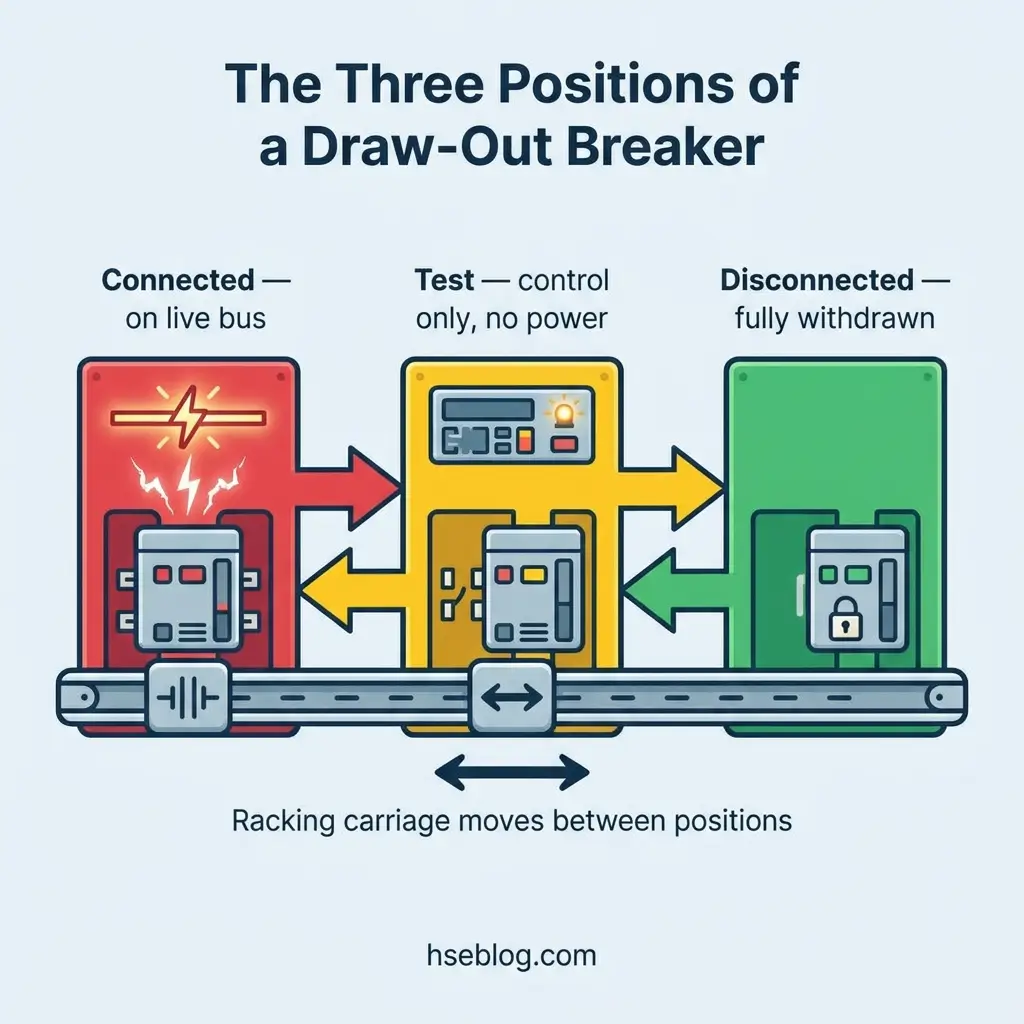
Racking is the mechanical process of moving a draw-out breaker between three defined positions. Each position changes what the breaker’s main contacts are connected to.
The connected, test, and disconnected positions
- Connected (service): The primary disconnects are fully engaged with the line- and load-side bus. The breaker can carry and interrupt full load current.
- Test: The primary contacts are separated from the bus, but the secondary control circuit stays live. You can operate the mechanism and prove trip functions without energizing the power circuit.
- Disconnected (isolated): Both primary and secondary contacts are parted. The breaker can be withdrawn from the cell or removed entirely.
Racking in advances the carriage from disconnected toward connected. Racking out reverses that travel.
Why the primary disconnects are the hazard
The danger lives in the gap between the moving fingers and the fixed stabs. During that travel the contacts are neither fully open nor fully closed, and the insulating distance is at its most vulnerable.
If a fault initiates here, it does so centimetres from the person turning the handle. That single fact shapes every control that follows.
Why Racking Sits Among the Highest Arc Flash Exposures
Racking is one of the specific tasks where an arc flash can occur even during otherwise normal operation. The breaker is being manipulated while its contacts move through a high-stress zone, and the operator stands directly at the enclosure.
An arc fault turns air into conductive plasma in milliseconds, releasing thermal energy, a pressure wave, molten metal, and shrapnel. The heat alone reaches temperatures well beyond the melting point of copper.
- Incident energy is the measure that matters. Arc flash severity is expressed in calories per square centimetre (cal/cm²) at the working distance, driven by available fault current and how fast protection clears the fault.
- The arc flash boundary marks the burn threshold. Under NFPA 70E, it is the distance at which incident energy falls to 1.2 cal/cm² — the level that causes a second-degree burn on bare skin (US Department of Labor / OSHA, 2024).
- Above 40 cal/cm², PPE is survival gear, not injury prevention. NFPA 70E does not permit energized work above that level; the equipment must be de-energized first.
- Racking is a defined trigger for an energized electrical work permit. NFPA 70E §130.2(B) requires a permit when a worker interacts with equipment in a way that raises the likelihood of an arc flash — racking is precisely that interaction.
The reason racking is treated so seriously is positional, not theoretical. When the fault starts, the operator is inside the boundary and in the blast path. OSHA’s guidance on protecting employees from arc flash hazards, OSHA publication 4472, sets out how these boundaries and the electrically safe work condition fit together.
A Safe Racking Sequence, Step by Step
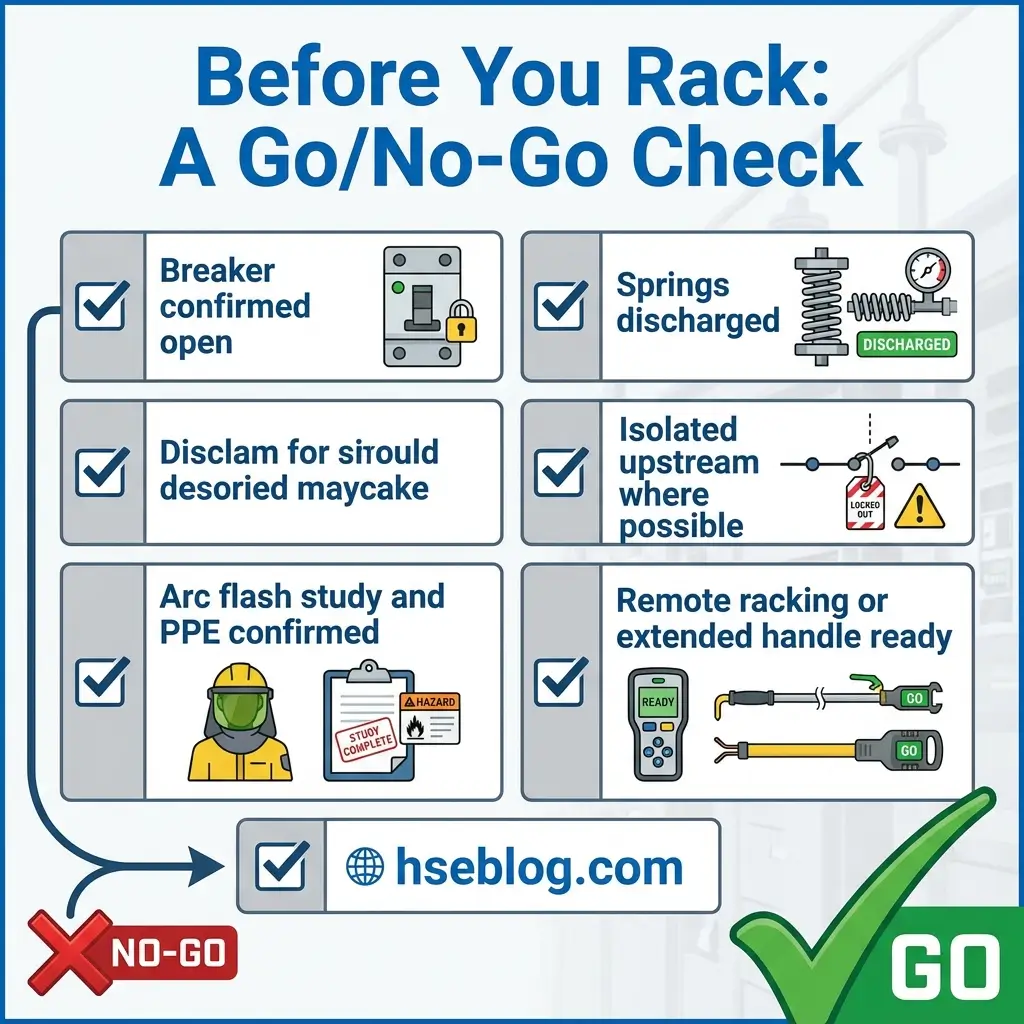
The safest energized racking is racking you avoid. Wherever the design allows, isolate upstream and rack the breaker dead — an electrically safe work condition removes the arc flash source rather than protecting against it.
This article provides general HSE knowledge. Racking energized medium-voltage switchgear is life-critical work that must be planned and supervised by a competent, qualified person with jurisdiction-specific authorization, a task-specific risk assessment, and the manufacturer’s procedure for that exact gear. The steps below do not replace any of that.
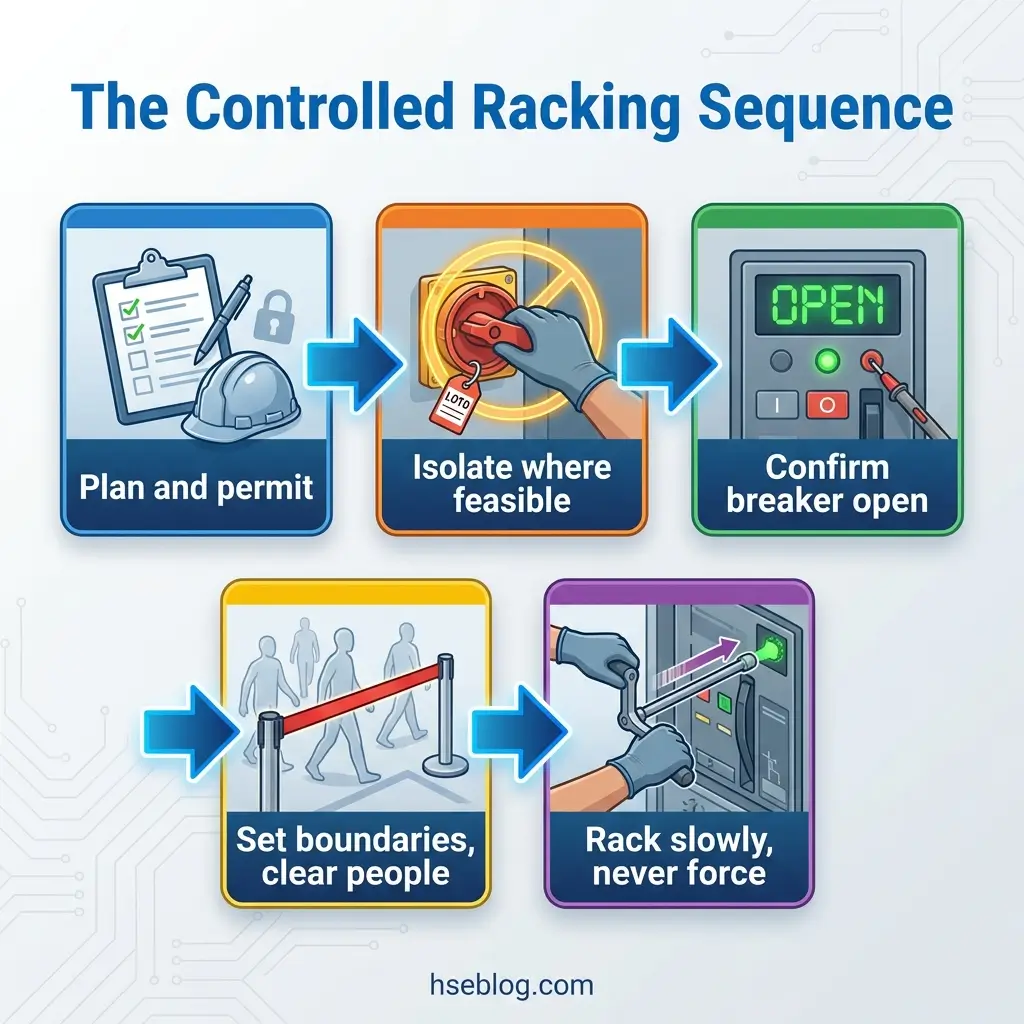
When racking is necessary, the sequence below reflects standard practice for draw-out gear:
- Plan the task and confirm authorization. Identify the equipment, review the arc flash study, and issue an energized electrical work permit where the assessment requires one.
- Establish an electrically safe work condition where feasible. Isolate the source, apply lockout/tagout, and verify de-energization before treating the circuit as safe.
- Confirm the breaker is open. Never rack a closed breaker. Verify the open position and that stored energy — closing springs — is discharged.
- Check the mechanism and contacts. Look for damage, contamination, or misalignment on the primary disconnects, shutters, and racking screw before applying force.
- Set the boundaries and clear people. Barricade the limited and restricted approach zones, and keep everyone not performing the task well clear.
- Position the operator and confirm PPE. Stand to the side of the cell rather than in front of the door, and wear arc-rated PPE matched to the incident energy.
- Rack slowly and steadily. Turn the handle at a controlled rate and listen for resistance.
- Never force a bind. If the carriage stops moving, stop. Investigate the cause instead of driving through it — a relieved bind can slam contacts closed under load.
- Confirm the final position. Verify the breaker is fully seated in connected or fully parted in disconnected before leaving the equipment.
For anyone owning this task, recognized training is the baseline: qualified-person training to NFPA 70E in the US, authorized-person schemes under HSE guidance in the UK, or the regional equivalent. Program-level responsibility is well served by NEBOSH or IOSH certification.
Distance as the Control: Remote Racking and Arc-Resistant Switchgear
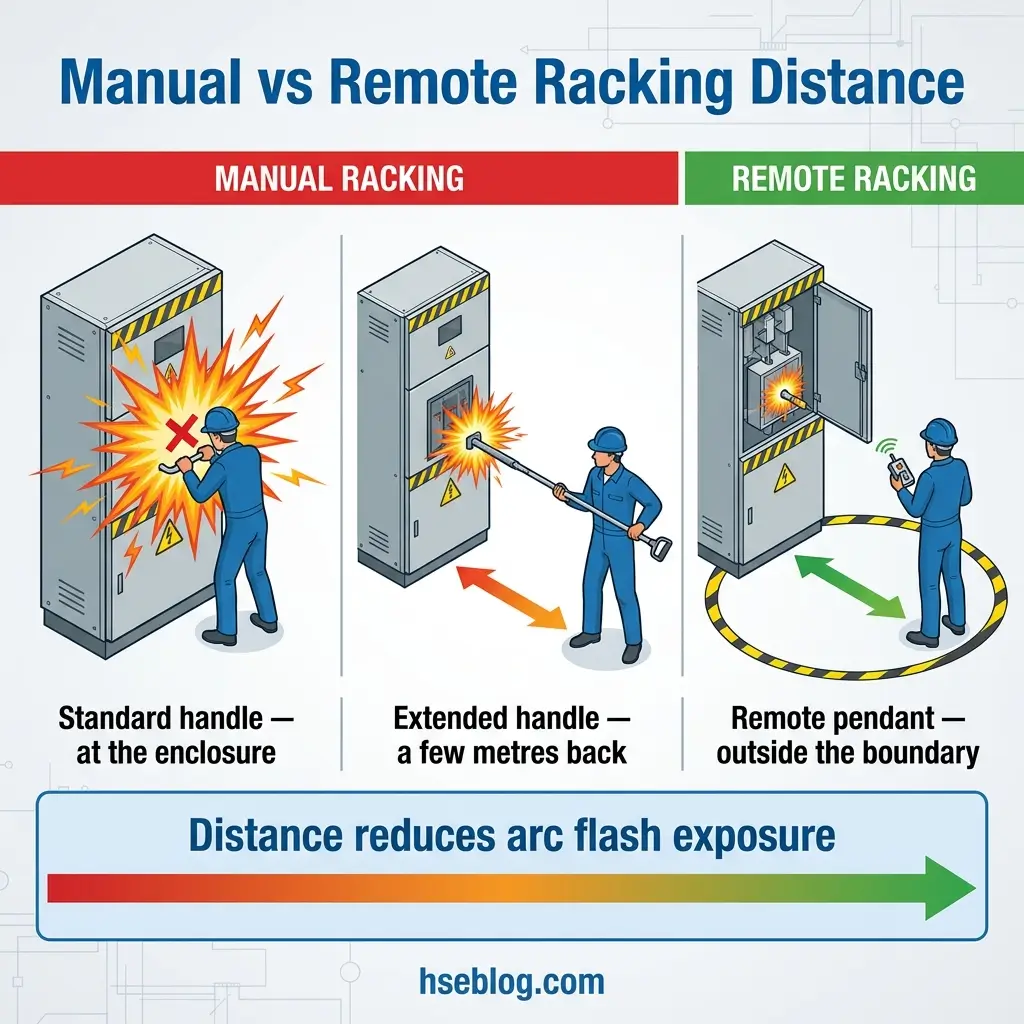
The most effective control for racking is distance. If the operator cannot be at the enclosure when a fault could start, the fault cannot injure them.
Two engineering approaches deliver that separation: remote operation and arc-resistant construction. They address different parts of the problem and are strongest together.
| Method | Operator position | When it fits |
|---|---|---|
| Standard racking handle | At the cubicle, inside the boundary | Low incident-energy gear only; least protective |
| Extended racking handle | Roughly 1.2–3 m (4–10 ft) back | Interim distance where remote racking is not installed |
| Tethered remote pendant | Outside the arc flash boundary | Retrofit-friendly; keeps the operator well clear |
| Motorized / control-room racking | Fully remote, another room | Highest separation; best for high-energy switchgear |
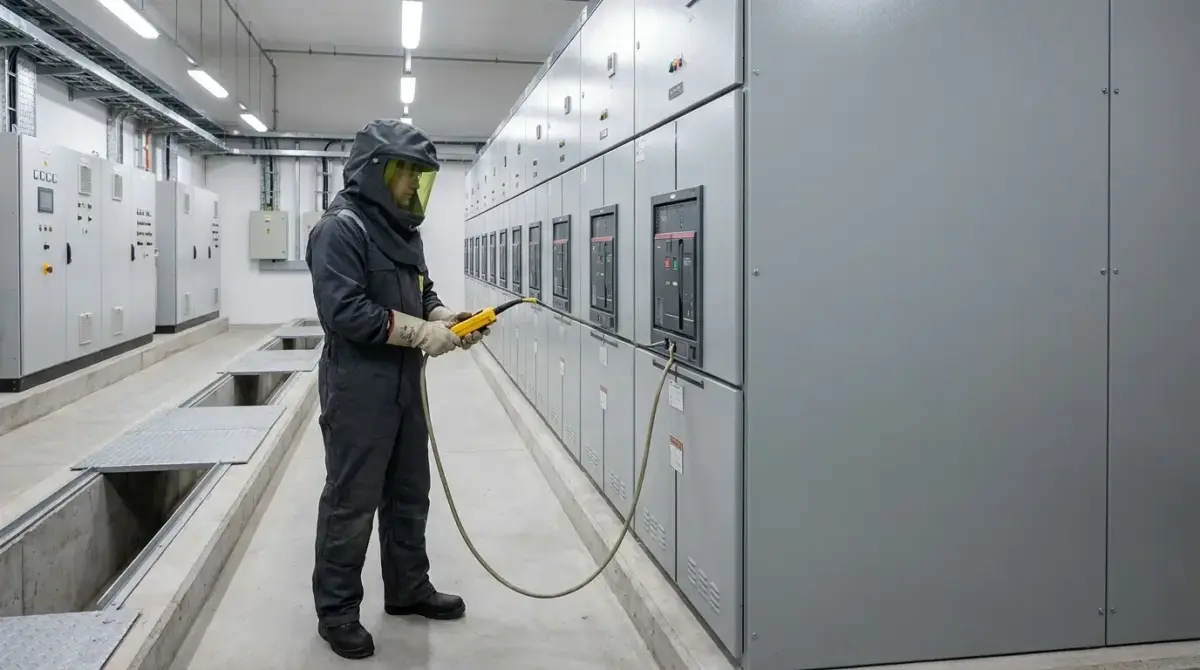
Remote racking devices let an operator insert or withdraw a breaker from outside the boundary using an umbilical-connected pendant, often placing them 6 to 15 metres away. Where remote racking is not fitted, an extended handle is a practical interim measure.
Arc-resistant switchgear is the second layer. Certified to IEEE C37.20.7 in North America or classified for internal arc under IEC 62271-200 internationally, it is built to redirect the pressure and gases of an internal arc away from personnel.
A common and dangerous misconception is that arc-resistant means arc-proof. It does not. The protection only holds when the doors are closed and properly latched, and accessibility ratings define which faces of the lineup are actually protected — the judgment call is to match the accessibility type to where people stand during operation.
Racking Rules Across Jurisdictions: NFPA 70E, OSHA, the HSE, and IEC
Racking obligations depend on where you operate. The frameworks agree on the principle — separate the person from the energy — but differ in how they enforce it.
United States: NFPA 70E and OSHA
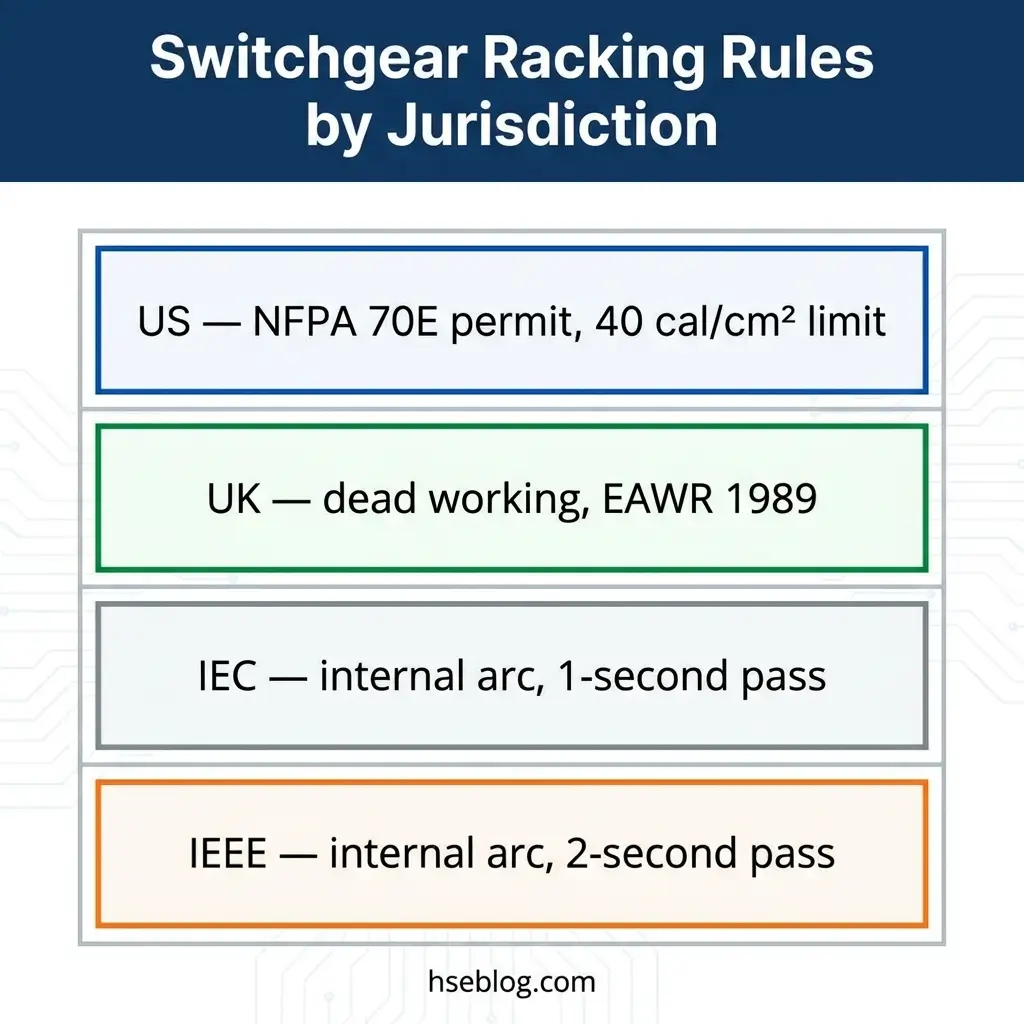
An energized electrical work permit is required under NFPA 70E §130.2(B) when work crosses the restricted approach boundary or when interaction raises arc flash likelihood, which captures most energized racking. Energized work above 40 cal/cm² is prohibited. OSHA reinforces this through 29 CFR 1910.147 for lockout/tagout and 29 CFR 1910.333(b), which treats any de-energized part that is not properly locked or tagged out as still energized.
United Kingdom: Electricity at Work Regulations 1989 and HSE guidance
In practical terms, UK law starts from dead working. Regulation 13 requires precautions for work on equipment made dead, and Regulation 14 permits live working only where it is unreasonable to work dead and suitable precautions are taken.
The applied guidance sits in HSG85, Electricity at work: Safe working practices, and in the switchgear-specific HSG230, Keeping electrical switchgear safe. Both interpret the duties for anyone selecting, operating, or maintaining switchgear.
International equipment standards: IEC 62271-200 and IEEE C37.20.7
Comparing the two arc-resistance regimes reveals a real difference. IEC 62271-200 and IEEE C37.20.7 both test metal-enclosed medium-voltage switchgear for internal arcing faults, but their criteria diverge — the IEC indicator pass time is 1 second against IEEE’s allowance of 2 seconds. Treat the IEC criterion as the more protective where a unit must satisfy both, and never assume a certificate under one standard satisfies the other.
Regulatory content here reflects general HSE professional understanding of the referenced US, UK, and international requirements as of 2026. It is not legal advice. Specific compliance questions, enforcement situations, or prosecution risk should be directed to qualified legal counsel in the applicable jurisdiction.
Where Racking Goes Wrong: Lessons From the Record
The published enforcement record makes the failure patterns concrete. In one HSE case, a contractor was injured on 11,000-volt switchgear that had not been isolated, after which the factory occupier’s own staff also worked near the live, exposed equipment without the competence to do so.
The occupier was prosecuted under the Health and Safety at Work etc. Act 1974 and fined £12,500 (HSE, maintenance case study). The wider incident record also includes cases where a breaker closed while partially racked out, with fatal results — the exact scenario the “confirm open” step exists to prevent.
Most racking failures repeat a short list of causes:
| Failure mode | How the fault starts | Control that prevents it |
|---|---|---|
| Racking a closed breaker | Contacts make or break under load | Confirm open position and discharged springs first |
| Forcing through resistance | A relieved bind slams contacts | Stop, investigate, never drive through |
| Worn or contaminated contacts | Heating and flashover at the stabs | Inspect and maintain disconnects and shutters |
| Skipping isolation | Live bus present throughout | Establish an electrically safe work condition where feasible |
| Standing in front of the door | Operator sits in the blast path | Position to the side or rack remotely |
| Reusing another site’s procedure | Wrong sequence for this equipment | Follow the OEM manual for that exact unit |
The misconception worth naming is that racking a switched-off breaker is inherently safe. It is not — the bus and line side can remain live, and a fault can still initiate during the contact travel.
Frequently Asked Questions
Where Switchgear Racking Is Heading
The direction of travel in switchgear racking is toward removing the operator from the hazard entirely. Remote racking, once treated as an upgrade, is increasingly the default expectation for higher-energy gear, and many older facilities are retrofitting motorized mechanisms rather than accepting hands-on operation inside the boundary.
The standards are moving with the practice. The 2024 edition of NFPA 70E sharpened its boundary and labeling requirements, and IEEE C37.20.7 was reissued in 2024, while incident-energy reduction through faster relays and arc-flash maintenance switches keeps shrinking the exposure at its source.
None of that changes the one habit that decides most outcomes at the cubicle: confirm the breaker is open, respect a bind, and put distance between yourself and the contacts before you ever turn the handle.